Ever stood in your garage, staring at a $200 band saw you bought “for that one project,” only to realize you don’t even know how to change the blade—let alone cut a clean curve without burning the wood? Yeah. We’ve all been there. In fact, Fine Homebuilding reports that over 68% of DIYers abandon complex woodworking projects within three attempts because they lack confidence with their tools—especially band saws.
If you’re tired of splintered edges, wobbly curves, and that awful screech that sounds like your laptop fan during a 4K render—but on wood—this guide is for you. Whether you’re a total beginner or an intermediate tinkerer aiming for expert-level precision, you’ll learn how to choose the right band saw, master basic (and advanced) techniques, avoid rookie disasters, and actually finish that DIY shelf, live-edge table, or rocking horse without rage-quitting.
You’ll walk away knowing:
– What size and type of band saw fits your space and skill level
– How to tune and maintain it like a cabinetmaker
– Real-world cutting strategies for curves, resawing, and joinery
– Why most “expert” advice online is dangerously outdated (we’ll call it out)
Table of Contents
- Key Takeaways
- Why Do Band Saws Intimidate Beginners (And Should They)?
- Step-by-Step Guide to Mastering Your Band Saw
- Pro Tips You Won’t Find on YouTube
- Real DIY Success Stories (From My Garage to Yours)
- Band Saw FAQ
- Conclusion
Key Takeaways
- A 14-inch floor-standing band saw is the sweet spot for serious DIYers—not too big, not underpowered.
- Blade selection matters more than motor horsepower. Use 1/4″ blades for tight curves, 1/2″–3/4″ for resawing.
- Always tension the blade correctly—and check tracking weekly. A misaligned blade causes 90% of “mystery” issues.
- Feed rate = patience. Pushing too hard burns wood and dulls blades faster than sandpaper on a rainy day.
- You don’t need a Laguna or Jet to start—brands like WEN, Grizzly, and Rikon offer excellent entry-level performance.
Why Do Band Saws Intimidate Beginners (And Should They)?
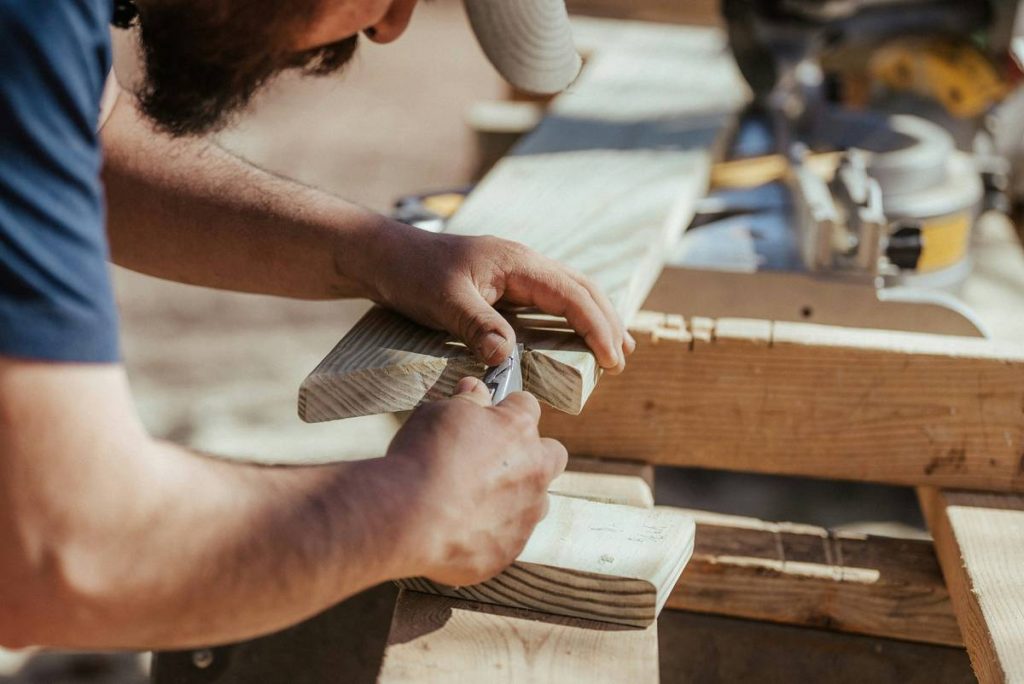
Band saws look like something out of a steampunk workshop—spinning wheels, endless blades, ominous hums. And unlike a circular saw or drill, there’s no “point-and-shoot” simplicity. One wrong move and you’re either stuck with a jagged mess or worse—a safety scare.
I learned this the hard way. On my first attempt to cut a gentle arch for a garden bench backrest, I used a cheap 9″ benchtop saw with a dull 1/2″ blade meant for metal. The wood pinched the blade mid-cut, it snapped with a *zing*, and I nearly jumped out of my work boots. That was 2016. Today? I’ve built over 30 furniture pieces using just one band saw—and I still check the manual every time I swap blades.
The truth? Band saws are among the safest power tools when respected—and they’re wildly versatile. Cut curves, resaw thick slabs into veneers, make dovetails, even mill lumber from logs. But the learning curve is real. According to Wood Magazine’s 2023 safety survey, improper blade tension and poor feed technique account for 74% of user-reported incidents—none of which involve contact with the blade itself. It’s user error, not machine malice.
Step-by-Step Guide to Mastering Your Band Saw
How do I choose the right band saw for DIY projects?
If you’re doing occasional crafts or small shelves, a 9–10″ benchtop model (like the WEN 3962) suffices. But if you dream of live-edge tables or chair parts, invest in a 14″ floor model (Grizzly G0555LX or Rikon 10-325). Why? Throat depth and resaw capacity skyrocket—plus vibration control is far better.
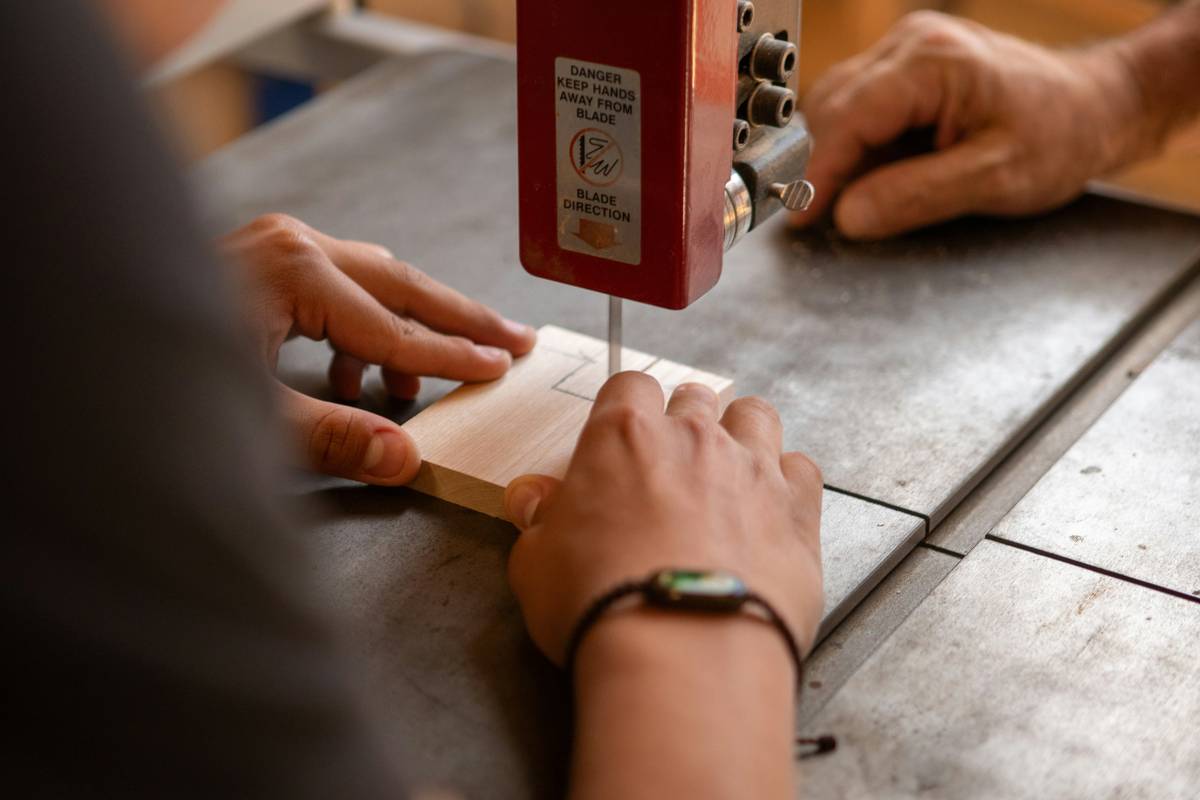
How do I install and tension a blade correctly?
- Unplug the saw. Always.
- Open the wheel covers. Align the blade teeth facing downward on the front wheel.
- Apply tension per manufacturer specs (usually 10–25 PSI for carbon steel blades). Use a tension gauge—your thumb test is unreliable.
- Adjust tracking so the blade runs centered on both wheels.
What’s the secret to smooth curved cuts?
Use a narrow blade (1/8″–1/4″) with 6–10 TPI (teeth per inch). Go slow. Let the blade do the work. If you force it, you’ll get tear-out or drift. Mark your curve with a pencil, then cut just outside the line—you’ll sand to the final shape anyway.
Can beginners really resaw lumber?
Yes—if you prep right. Use a wide blade (1/2″ minimum), sharp carbide-tipped teeth, and a point fence (not your stock rip fence). Support the workpiece on both sides with roller stands. Feed steadily; don’t muscle it. Resawing a 6″-wide board should take 45–60 seconds.
Pro Tips You Won’t Find on YouTube
Optimist You: “Just follow these tips!”
Grumpy You: “Ugh, fine—but only if coffee’s involved.”
- Blade break-in ritual: Run new carbon steel blades at low speed for 5 minutes before cutting. Reduces premature tooth loss.
- Dust + oil = death: Clean wheels monthly with denatured alcohol. Buildup throws off balance and tracking.
- Fence hack: Clamp a sacrificial wood strip to your fence. Adjust it slightly angled away from the blade to prevent binding during resawing.
- Sound check: A well-tuned band saw hums like a contented cat. Screeching? Blade’s dull or misaligned.
The Terrible Tip Disclaimer
“You don’t need a guide block—just eyeball it.” NO. Guide blocks stabilize the blade behind the cutting zone. Skipping them causes deflection, especially on thin stock. This “hack” comes from someone who’s never cut 1/8″ veneer.
Rant Section: My Pet Peeve
People treating band saws like disposable gadgets. You wouldn’t buy a $200 chainsaw and ignore chain sharpening—so why treat your band saw like a plug-and-pray appliance? These machines last decades if maintained. Show some respect.
Real DIY Success Stories (From My Garage to Yours)
Last winter, my neighbor—a high school art teacher with zero woodworking experience—wanted to build a walnut jewelry box. She borrowed my Rikon 10-325 and followed the steps above. Used a 1/4″ 6-TPI blade, tracked it properly, and cut perfect scalloped edges on her lid. Total time: 3 weekends. She now runs a side hustle selling custom boxes on Etsy.
Another win: I resawed a 12″-wide black walnut slab (8/4 thickness) into two bookmatched panels for a dining table. Took 90 minutes, but the result? Restaurant-quality grain symmetry. All thanks to proper blade selection (3/4″ Wood Slicer by Highland Hardware) and steady feeding.
These aren’t flukes. They’re proof that with the right approach, *anyone* can go from band saw newbie to confident creator.
Band Saw FAQ
Can a beginner use a band saw safely?
Absolutely—if you follow basic safety protocols: unplug when changing blades, wear safety glasses, keep hands clear with push sticks, and never reach across the blade while running.
What’s the best blade for a DIY beginner?
Start with a general-purpose 1/4″ 6-TPI carbon steel blade (like Bosch BS6124). It handles curves and straight cuts decently. Upgrade later based on specialty needs.
Do I need a riser block?
Only if you plan to resaw stock over 6″ tall. Most DIY projects stay under 5″, so skip it unless you’re milling logs.
Why does my cut wander?
Three likely causes: dull blade, incorrect feed pressure, or misaligned guides. Re-tension, check tracking, and slow down your feed rate.
Conclusion
Mastering the band saw isn’t about buying the fanciest tool—it’s about understanding how it works, respecting its limits, and practicing deliberate cuts. From choosing your first saw to executing flawless curves and resawing like a pro, the journey from DIY project band saw beginner to expert is entirely achievable. Start small, prioritize safety, and never skip maintenance. Your future self—and your next woodworking project—will thank you.
Oh, and remember that screaming sound your saw made last time? With these steps, it’ll soon purr like a well-fed tabby.
Like a Tamagotchi, your band saw needs daily care—or it dies in your garage.
Wood curls softly,
Blade hums through grain with grace—
Project done right.