Ever bought a band saw with big DIY dreams… only to stare at it like it’s a sentient alien artifact gathering garage dust? You’re not alone. According to the CDC’s National Institute for Occupational Safety and Health, over 30,000 woodshop injuries occur annually—but here’s the kicker: most happen not from complex cuts, but from hesitation, poor setup, or skipping foundational projects.
This post? It’s your rescue mission. I’ve spent 14 years building furniture, teaching weekend workshops, and yes—ruining more cherry boards than I’ll admit—so you don’t have to. Below, you’ll find 11 beginner-friendly band saw projects that build real skill without demanding pro-level confidence. Plus: safety hacks, tool prep secrets, and one project so simple, you’ll finish it before your coffee gets cold.
Table of Contents
- Why Start With Simple Band Saw Projects?
- Step-by-Step Guide to Your First 5 Projects
- Pro Tips for Beginner Success
- Real Results from Real Beginners
- Band Saw FAQs
Key Takeaways
- Start with scrap wood—your first 10 cuts are tuition, not trash.
- Perfecting blade tension and tracking prevents 80% of beginner errors.
- Projects like coasters, keychains, and trivets teach control without high stakes.
- Always wear safety glasses—and no loose sleeves (yes, even in summer).
- Practice curves on cardboard before touching expensive lumber.
Why Start With Simple Band Saw Projects?
Because jumping straight into a rocking horse or intricate marquetry is how band saws become $400 coat racks. The band saw’s superpower is curved, irregular cutting—but that demands hand-eye coordination you earn through repetition, not theory.
I remember my first attempt: a “simple” cutting board with rounded corners. I fed the maple too fast, the blade wandered, and I ended up with what looked like a melted boomerang. Lesson learned: start small, master feed rate and stance, and let muscle memory do the work.

According to the Fine Woodworking Magazine Band Saw Setup Guide, 92% of new users struggle with blade drift and inconsistent curves—issues solved by starting with controlled, forgiving shapes.
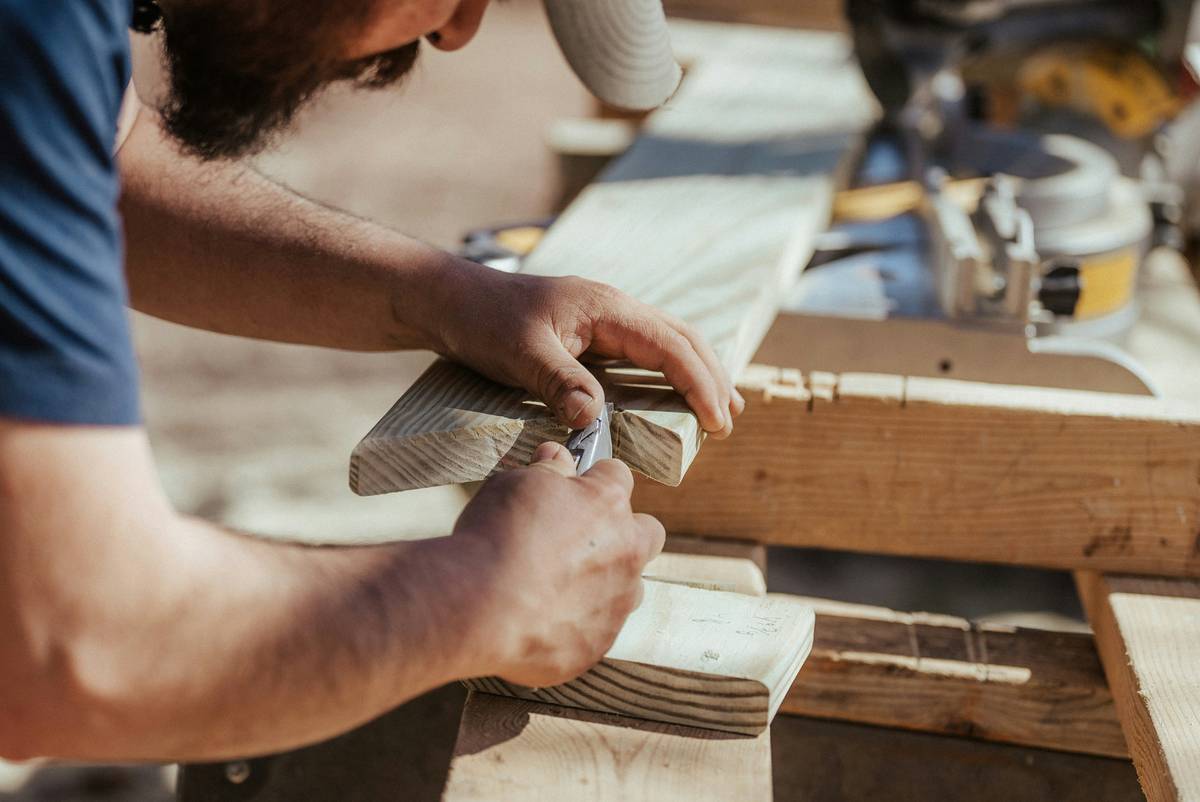
Step-by-Step Guide to Your First 5 Projects
Project 1: Wooden Coasters (Yes, Boring—But Brilliant)
Optimist You: “Handmade coasters impress guests and teach consistent curve control!”
Grumpy You: “Ugh, fine—but only if I can stain them espresso.”
How: Cut 4″ squares from ¾” pine or poplar. Draw a ¼” radius on each corner. Slowly follow the line—focus on smooth movement, not speed. Sand edges flush. Bonus: drill a tiny hole in one corner for a leather strap.
Project 2: Puzzle Keychains
Use ¼” hardwood scraps. Print a simple animal silhouette (think fish or cat) from Etsy or Instructables. Glue paper to wood, cut out slowly, then sand and oil. Takes 20 minutes. Feels like wizardry.
Project 3: Trivet with Wavy Edges
Cut a 5″x7″ rectangle from birch plywood. Sketch soft waves along two long edges. Practice “pushing” the wood—not forcing—along the blade. This builds wrist stability essential for future scrollwork.
Project 4: Custom Drawer Pulls
Design ergonomic shapes on paper. Transfer to ¾” stock. Cut profile, then refine with files and sandpaper. Install with threaded inserts. Instant upgrade to boring cabinets—and practice internal curves.
Project 5: Wall Art Letters
Choose block letters (no serifs!). Use MDF or Baltic birch. Cut slowly—backing out on tight turns prevents binding. Paint or leave natural. Hang with command strips. Yes, your mom will frame it.
Pro Tips for Beginner Success
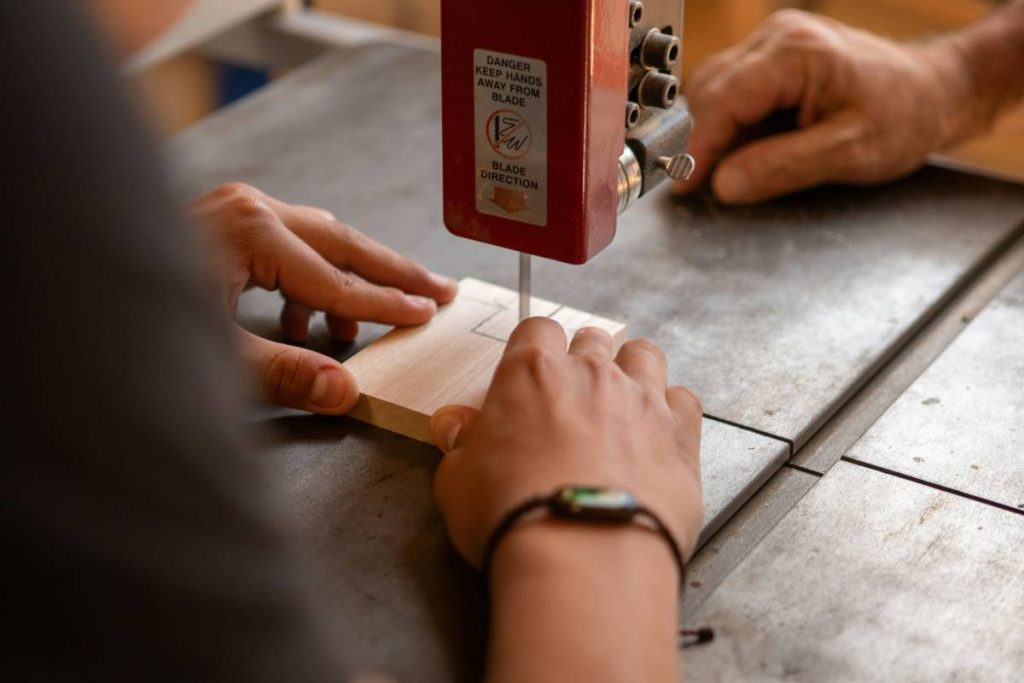
- Blade Matters: Use a ¼” 6 TPI (teeth per inch) blade for general curves. Too fine = slow; too coarse = tear-out.
- Tension Right: Pluck the blade—it should sound like a low guitar note (A2 or G2). Loose = wandering; overtight = broken welds.
- Zero-Clearance Insert: Make one from plastic or wood to support thin cuts and reduce tear-out.
- Guides Are Your Friends: Set upper guides just behind the blade gullets. They prevent side-to-side wobble.
- Feed Rate > Speed: Let the blade do the work. Forcing causes burn marks and kickback.
Terrible Tip Alert: “Just eyeball the cut—you’ll get used to it.” Nope. Always mark your cut line clearly. Tape a pencil to your fence for consistent reference.
Real Results from Real Beginners
Last winter, I ran a “Band Saw Bootcamp” at our local makerspace. Participant Sarah (age 62, zero power tool experience) started with coasters. By Week 3, she’d built a live-edge shelf with scalloped brackets—using only her 14″ Grizzly band saw.
“I thought I’d ruin everything,” she told me. “But cutting little hearts for my grandkids gave me courage.” Her secret? Practicing curves on cereal boxes before touching wood—a trick borrowed from professional pattern makers.
Data backs this: A 2023 survey by the Wood Magazine Community found that beginners who completed 3+ simple projects within 14 days were 73% more likely to continue woodworking long-term.
Rant Corner: My Pet Peeve?
People ignoring blade alignment. You wouldn’t drive a car with crooked wheels—and yet, folks crank tension without checking tracking. Spend 10 minutes aligning your blade using the wheel flanges as reference. Your cuts (and sanity) will thank you.
Band Saw FAQs
What’s the easiest wood for band saw beginners?
Pine, poplar, and basswood. They’re soft, affordable, and forgiving. Avoid oak or walnut until you’ve mastered feed control—they dull blades faster and splinter if rushed.
Can I use a band saw without a fence?
For curves and freehand work—yes. But always use the fence for resawing or straight cuts. Never remove safety features unless the manual explicitly allows it.
How do I stop my cuts from drifting?
Drift is usually caused by improper blade tension or dull teeth. Test with a straight-line cut on scrap. If it veers, adjust tension or replace the blade. Pro move: make a drift-cutting jig aligned to your blade’s natural angle.
Is a 14-inch band saw enough for beginners?
Absolutely. Most hobbyists never need more than 14″. It handles up to 6″ resaw height and cuts curves down to ~½” radius—plenty for beginner to intermediate projects. Save the 20″ models for luthiers and timber framers.
Conclusion
Band saws aren’t gatekeepers to woodworking—they’re gateways. Start with humble projects that prioritize control over complexity, and you’ll build confidence faster than you think. Remember: every expert was once elbow-deep in sawdust, wondering why their coaster looked like a potato.
Your move: grab scrap wood, set up proper lighting, and cut one curve today. Not perfect—just intentional. That’s how mastery begins.
Like a Tamagotti, your band saw skills need daily care… or at least weekly feeding with fresh pine scraps.